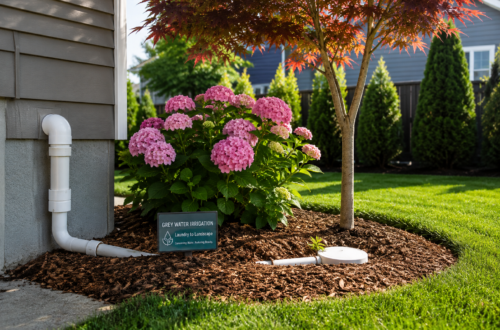
Water is the lifeblood of any garden, but as utility costs rise and environmental concerns grow, relying solely on the tap is becoming both expensive and unsustainable. For the conscious gardener, the solution is falling right from the sky. Rainwater harvesting is an ancient practice that is making a modern comeback, offering a way to nourish your Urban Oasis while significantly reducing your monthly expenses.
At Bloohome, we advocate for systems that are both functional and beautiful. Harvesting rainwater isn’t just about catching drips in a bucket; it’s about creating a safe, efficient, and Sustainable Living practice that benefits your soil, your plants, and your wallet.
Why Rainwater is Better for Your Plants
Have you ever noticed how your garden seems to “jump” with growth after a rainstorm compared to a session with the garden hose? This isn’t just your imagination.
- Chlorine-Free: Tap water is treated with chemicals like chlorine and fluoride to make it safe for humans, but these can be harsh on sensitive soil microbes.
- The Perfect pH: Rainwater is naturally slightly acidic, which helps plants absorb minerals more effectively from the soil.
- Nitrogen Boost: Lightning during storms breaks apart nitrogen molecules in the atmosphere, which then hitch a ride on raindrops directly to your plants’ roots.
Phase 1: Planning Your Harvesting System
In a small backyard or urban setting, your primary catchment area is your roof. Even a modest roof can collect thousands of gallons of water in a single year.
Calculating Your Yield
To estimate your potential, use this simple formula: 1 inch of rain on a 1,000-square-foot roof yields approximately 600 gallons of water. Even in drier months, you’ll be surprised at how quickly a rain barrel fills up.
Choosing Your Barrel
- Food-Grade Containers: Always ensure your barrel is made from food-grade plastic or high-quality wood to prevent chemicals from leaching into your water.
- Opaque Materials: Choose dark-colored barrels (dark green, black, or brown) to block out sunlight, which prevents algae from growing inside the tank.
Phase 2: Essential Safety Features
To keep your water “safe,” as the title suggests, you must prevent the three biggest risks: debris, mosquitoes, and overflow.
- Debris Filters: Install a “Leaf Eater” or a fine mesh screen where the downspout enters the barrel. This keeps out leaves, twigs, and bird droppings.
- The First Flush Diverter: This is a simple pipe system that diverts the first few gallons of a rainfall—which usually contains the most dust and pollutants from the roof—away from the barrel.
- Mosquito Proofing: Ensure all openings are covered with a very fine mesh. If mosquitoes can’t get in, they can’t lay eggs.
- Overflow Management: When the barrel is full, the water needs somewhere to go. Connect an overflow hose that leads away from your home’s foundation and toward a Rain Garden or a permeable area of your yard.
Phase 3: Step-by-Step Installation
- Level the Ground: A full 50-gallon barrel weighs over 400 pounds. Use concrete pavers or a sturdy wooden stand to create a level, stable base.
- Elevate the Barrel: Gravity is your friend. By raising the barrel on a stand, you increase the water pressure for your hose and make it easier to fit a watering can under the spigot.
- Divert the Downspout: Use a downspout diverter kit. These are excellent because they automatically redirect water back down the main drain once the barrel is full.
- Seal the Connections: Use plumber’s tape on the spigot to ensure there are no leaks. Every drop saved is money in your pocket.
Phase 4: Using Your Harvested Water
To maximize your Seasonal Success, use your rainwater strategically:
- Target Sensitive Plants: Use your “black gold” water for your Home Apothecary herbs and vegetable seedlings first, as they benefit most from the lack of chlorine.
- Morning Watering: Always water early in the day to prevent evaporation and allow leaves to dry, reducing the risk of fungal diseases.
- Avoid Edible Leaves: If you don’t have a first-flush diverter, try to apply rainwater directly to the soil rather than spraying it on the leaves of lettuce or kale to be extra safe.
Phase 5: Winter Maintenance (The Montreal Protocol)
If you live in a climate with freezing winters like Montreal, you must winterize your system to prevent the barrel from cracking.
- Drain Completely: Empty the barrel before the first hard frost.
- Disconnect: Remove the diverter and re-attach your original downspout.
- Store Upside Down: This prevents ice from forming inside and keeps the barrel clean for the spring.
Conclusion: A Drop of Change
Rainwater harvesting is a small step that leads to a massive shift in how you interact with your environment. It turns a “waste product” into a valuable resource, turning your home into a model of Sustainable Living. By saving water today, you are ensuring a greener, more resilient garden for tomorrow.
Stay tuned to Bloohome for more guides on how to make your home as efficient as it is beautiful.